
DOWNLOAD THE APP


Customer Services
Copyright © 2025 Desertcart Holdings Limited
DOWNLOAD THE APP


🥚 Hatch like a pro — precision meets simplicity in every egg!
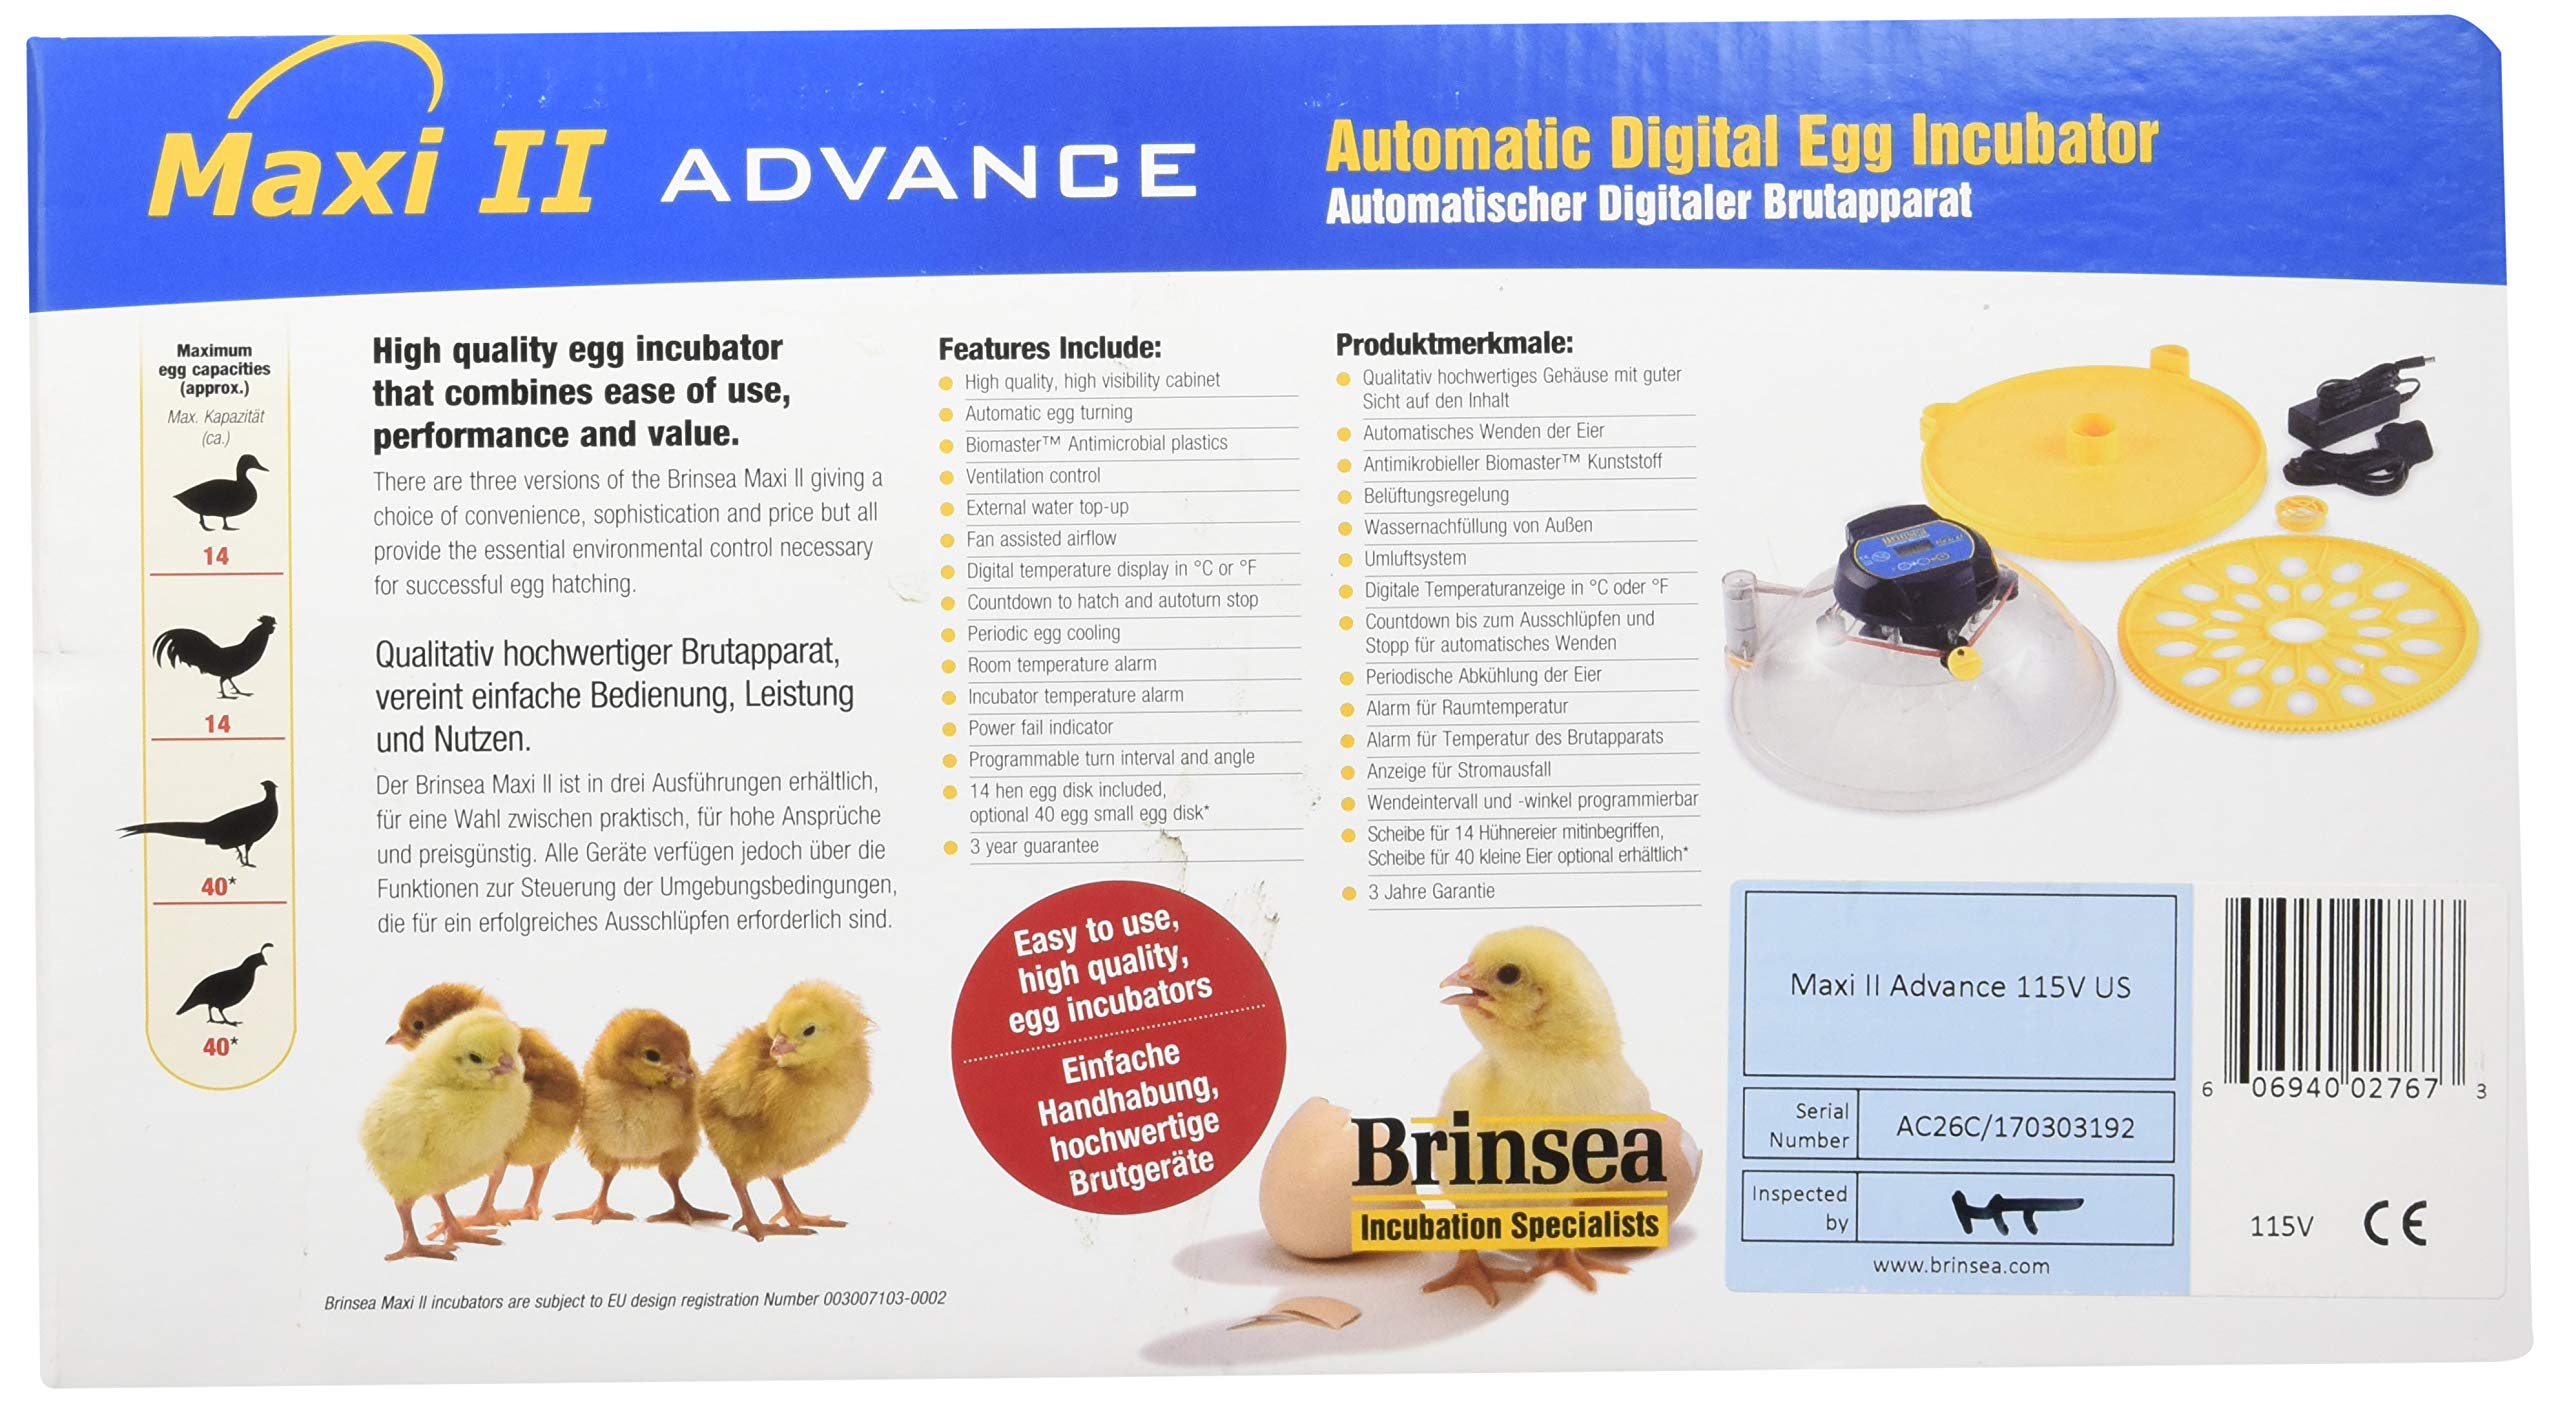
The Brinsea Maxi II Advance is a premium 14-egg incubator featuring fully digital micro-controlled settings, automatic egg turning with programmable intervals and auto-stop, and a countdown timer to hatch day. Its clear chamber offers excellent visibility, while robust ABS plastic ensures easy cleaning. Designed for reliable, high hatch rates, it includes temperature alarms and factory preset incubation temperature adjustable to your needs. Ideal for both beginners and experienced hatchers seeking consistent, professional results.


| ASIN | B01N3M3XWI |
| ASIN | B01N3M3XWI |
| Age Range Description | Baby |
| Best Sellers Rank | #837,577 in Industrial & Scientific ( See Top 100 in Industrial & Scientific ) #194 in Lab General Purpose Incubators |
| Brand Name | Brinsea |
| Color | Yellow/Black |
| Customer Reviews | 4.1 4.1 out of 5 stars (172) |
| Date First Available | November 1, 2016 |
| Date First Available | November 1, 2016 |
| Directions | Follow directions in User Manual supplied |
| Included Components | incubator |
| Is Discontinued By Manufacturer | No |
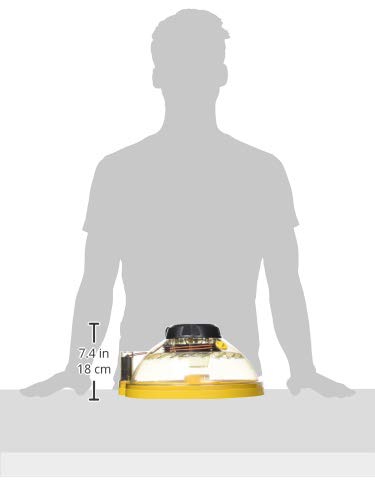
| Item Dimensions LxWxH | 12.5 x 12.5 x 7 inches |
| Item Package Dimensions L x W x H | 13.3 x 13.3 x 7.7 inches |
| Item Weight | 5 Pounds |
| Item model number | USAC26C |
| Item model number | USAC26C |
| Manufacturer | Brinsea Products Inc |
| Manufacturer | Brinsea Products Inc |
| Material | ABS |
| Model Name | Brinsea Maxi II Advance Automatic 14 Egg Incubator |
| Number of Items | 1 |
| Product Dimensions | 12.5 x 12.5 x 7 inches; 5 Pounds |
| Size | One Size |
| Specific Uses for Product | Egg incubation |
| Target Audience Keyword | Birds |
| Warranty Description | 3-year parts & labor |
C**T
Worked Very Well For Me
This was my first time ever trying to hatch chicken eggs and I was successful. I started two fertile eggs and I hatched two eggs. The major issues with this Incubator is that there is no way to know what the humidity level is because there is no feature that measures the humidity. This is a very good Incubator but if you buy it then make sure to buy a Mini Hygrometer that can be placed inside the Incubator. Another issue with this Incubator is that it doesn't hold the temperature well if the room temperature is cold. I had to wrap the dome with a towel to insulate the Incubator. Overall there could be some improvements but the bottom line is did the Incubator hatch the eggs, and yes it did and I'm happy with the results. This Incubator is expensive but I would buy this Incubator again if I needed another one.
A**R
Best hatching rate yet
I’ve consistently had a 95% hatch rate using this incubator. I’ve hatched eggs that have been shipped to me that were 14 days old by the time they arrived and had 8 or 12 eggs hatch. Mostly I’ve had 90-100% hatch rate out of about 10 sets of incubated sets. Easy to use and clean, directions are simple to understand.
M**Y
Works excellent
My Maxi II Advance arrived at the same time my eggs came. The first thing that impressed me about the Maxi II was that it look very well built and I can see thru the clear plastic. I have used a cheaper incubator in the past with terrible results. I checked that all the contents against the list in the user manual and carefully read the instructions. I turned ON the Maxi II Advance the only thing I had to change in the settings was from C to F on the display. After the temperature was reached I let the incubator settle for 1 day before I set 12 eggs on the turning tray. The instructions said to fill the water in half the pot in the center, go to the settings to change days to 21 and left the other settings untouched. Keeping the humidity was not a problem as the Maxi II Advance has a fill point on the outside. The only time I lifted the lid was to candle the eggs. Between days 18 to 19 I removed the egg tray and placed the eggs on the hatching mat provided. Around day 20 I noticed the pipping and it was long after that happy to hear chirping from my Maxi II Advance and could see the shells crack and the chicks appear. To witness this was amazing an experience. I had a 100 % hatch rate and want to thank Brinsea for this amazing incubator. I have no problem in recommending the Maxi II Advance simple word to the wise follow their easy instructions.
K**E
I like this unit a lot other than the humidity levels ...
I like this unit a lot other than the humidity levels during lockdown. Before setting eggs I ran tests to verify temp and humidity levels with one and then both chambers of water filled. Even with both chambers filled I couldn't get it past 60%. Also found the autofill does not work for filling both chambers. I was able to keep water in the attached chamber by filling from the outside but it does not rise up enough to spill into the second. Unit was level so that wasn't my issue. I had to tip the unit towards the outside chamber to get it to spill over which of course you cant do without tossing your eggs around! I took a small strip of paper towel about 4 inches long, folded it to make thicker and let it wick from inside chamber - up over chamber cover - and down into second chamber. This brought enough moisture closer to the fan which brought humidity up to where I needed for hatch. I suggest testing before using as the factory set temps are not always right. I learned the hard way not to depend on that! I purchased 2 of these units to split a larger batch started in another incubator I was having trouble with. The viable eggs placed in these units at one week incubation all hatched. Both units were dependable in keeping constant temps and I was pleased with the hatching mats that came with them. Clean up was easy. Chicks were content and not overly crowded like they are in the mini. Hope the next hatches go as well as these did!
S**N
This Incubator Does NOT Work Like It Should!
I am a long time fan of Brinsea incubators - I have three others (two Brinsea Mini Advanced 7 egg incubators and one Octagon 20 egger with automated humidity control unit). These units have served me well, but I'm now getting into selling rare breed baby chicks, so I needed to get another incubator so I could hatch more babies for sale. As happy as I have been with my previous Brinsea purchases, I didn't even look at any others. I went straight to Brinsea to get my fourth incubator. This 14 egg machine - with its advertised ability to have water added from the outside, without having to lift the lid and disrupt the existing humidity levels - seemed to be just what I needed. I have to admit, opening it was enough to concern me: you hardly get the box open, when there is a huge note on the inside of the box that says something to the effect of "Contact Brinsea if you have problems with this unit, before returning it." That's not the exact words (I can't give you the exact words, as I no longer have the box - or the incubator - but it was something to that effect). WTF? They are ALREADY figuring I am going to have problems with this unit??? That kind of notice never came with any of the previous incubators I had bought from Brinsea. I have to admit, that got me wondering.... But OK, I had the unit, and it looked really good, so I figured I'd plug it in and give it a 24 hour test run before I put any eggs in it. My eggs are too valuable to be put in a machine that I have not used before. That is when I began to realize WHY Brinsea printed the notice on the box. The machine does NOT perform the way that it is supposed to! You are supposed to be able to add water to the unit without opening it up. If you have hatched chicks before, you know how important this feature is to the welfare of the eggs inside, and since I am wanting to hatch particularly valuable eggs, it is all the more important for me. I plugged up the machine for a "test spin." Using distilled water (only kind I use in my incubators), I carefully added water to the outside watering bay with the lid off of the incubator, so I could watch it flow into the inside water bay. If you are familiar with these smaller Brinsea incubators, you already know that you fill up one half of the inside water bay with water, and keep it full, until day 18. The goal is to have around 40% humidity inside the unit. On day 18, you fill the second half of the inside water bay, with the goal of having around 60% to 70% humidity. The internal fan unit - located right above the inside water bays - spreads the humidity around the unit, thus keeping the eggs in proper humidity until hatching. What SHOULD have happened, was that when I poured the distilled water into the outside watering bay, the water should have flowed through the small plastic tubing on the bottom of the tray into that inside water bay, until the first half of the inside water bay was full. This would provide enough water to keep the incubator at proper humidity levels for the day. One reason for me running the incubator in this test run was to figure out how often I would have to add water to the unit to maintain proper humidity, before I put prized eggs into the machine. But the incubator didn't work right. It only filled about 1/3'rd of the half of the inside watering bay that it was supposed to fill, if I filled the outside watering bay to the point that Brinsea said to stop adding water. That certainly wasn't going to work -- humidity inside the incubator could never get high enough if only 1/3rd of the water needed was getting through the pipeline. (Tests using my hydrometer confirmed this.) Then I tried an experiment -- I decided to add water to the inside water well, the same way that you add water to the older Mini I Advanced Units like I already have. So I took some water and filled the one half of the water well that Brinsea tells you to fill to get proper humidity. WHEN I ADDED WATER DIRECTLY INTO THE INSIDE WATERING WELL, SOME OF THE WATER ACTUALLY FLOWED OUTSIDE THE INCUBATOR, TO THE OUTSIDE WATERING BAY !!!! This is DEFINITELY NOT supposed to happen. So at this point, I pulled out my leveler, to make sure that the incubator was level. It was. The problem was NOT an unlevel surface. So I drained all the water out of the thing, and tried a different experiment. I tried filling the outside watering bay completely to the top -- well past the point where Brinsea says to stop adding water. Well, a little more water managed to get into the unit than when I only added the amount that Brinsea said to add, but it still did not fill up 50% of the half of the inside watering bay that was supposed to be 100% full in order to keep humidity levels satisfactory. One thing that I noticed by this time: this incubator is at least twice the size of the smaller, 7 egg Mini Advanced that I have been using so successfully over the past few years -- yet the internal water bays (and hence, the amount of water available to keep the humidity levels up) were the same size. That didn't make sense to me -- how was that small amount of water supposed to keep such a huge unit sufficiently humid? Only way I can see that happening would be to double the amount of times water is added, which is doable, but is a PITA. Well, thing is -- I REALLY wanted this unit to work. I can make some good money hatching rare chicks this spring, but I need a fourth incubator to capitalize on the opportunity. So in the next days, I began trying all kinds of things, trying to find a routine that would make the incubator work. I had to quickly abandon any idea of using the outside water well to avoid opening the unit up during the incubation process, but I figured, I'm a pretty smart individual, so maybe I can figure another way to get the unit where it can safely hatch my eggs. I tried filling the one side of the internal water well - the side that was NOT directly attached to the plastic tubing that led to the outside water well - to see how keeping THAT side filled manually would affect humidity levels. Humidity levels never came near the 40% they needed to be, to safely incubate the eggs. So, I tried filling BOTH sides, and then filling the outside water well to the brim so that I wouldn't loose the water on that side of the inside water well to the backflow. That got humidity levels closer, but not close enough. On top of that, I found that I had to add water every 14 to 18 hours to keep both bays full. Who can run their entire lives around their incubator's watering schedule? Once every 24 hours might be doable, but having to water once every 18 hours? I tried placing a warm, wet kitchen sponge into the incubator to see what would happen. Actually, I experimented with several different size sponges to see what size might be best. The addition of the right size kitchen sponge could keep the thing at proper hydration levels for a while, but then the sponge would dry out, and humidity would drop even lower than before the sponge was put in there. I tried putting small pieces of sponge in bathroom size plastic Solo cups filled with water, but that was hard to regulate. And besides, that could be dangerous once the chicks began to hatch -- it is theoretically possible for them to drown in the water in one of those cups. But still, I was running experiments, and wanted to see what would happen. Then on top of all of that -- that lid is HUGE, and when it comes off in order for you to add water or add a wet sponge or whatever, humidity levels drop fast and hard. That is extremely dangerous for the welfare of the birds you are trying to hatch. I tried every thing I could think of. I put that thing through over two weeks worth of tests, trying to find a routine that would work. Nothing did, at least not long enough term for it to safely hatch eggs. I am sad to say, I could NOT make this incubator work. So, I've sent it back. I think I'm going to be looking at incubators other than Brinsea to find the incubator I need. It's about time for me to begin spring hatching. Edited to add: FYI, I DID attempt to get in touch with Brinsea, and even left a detailed review of my troubles on their website, but they never got back with me. So much for the idea of contacting Brinsea before returning this thing.
C**N
Tenia dudas de si iba a funcionar y ya empezaron a nacer las crias. Estamos felices. Muy facil de manejar
D**N
I'm in the midst of hatching my first ever batch of chicks. Put in 10 eggs (barnyard mix) and, as of now, 5 healthy babies have hatched. 1 more has pipped and I'm waiting anxiously. I was concerned about the temperature and humidity as I had seen others say the controls on many incubators (not just this brand) are inaccurate. After 2 days of adjusting and comparing to thermometers I set the machine to the recommended settings and left it. It worked great! The first chick pipped 7 hours after going into lockdown and hatched 17 hours later. The instruction manual is OK but there are a couple of online videos I watched before the incubator arrived and they were very helpful with understanding how the control panel works. Once you figure that it the rest is easy. I would suggest researching hatching and brooding by reading material from a reputable source. Far too many people getting eggs, chicks, chickens, rabbits, etc who have done no research and are relying on Facebook groups and online forums for answers. There is a lot of misinformation floating around. Also, be prepared to have to allow sick go. "Saving" an unhealthy animal serves no purpose and only prolongs their suffering.
D**L
Fantastic incubator. 14 out of 14 chicks. Easy to use. Bought a hydrometer to go with it. Only complaint, when chicks started hatching humidity level started climbing alot even with the 1 vent all the way open. Would like to see more vents so I dont have to lift dome to lower humidity level. But overall definitely recommend
A**R
I have other incubators but the Brinsea is easiest to use with a higher hatch rate
N**E
I put 13 eggs in it and 9 hatched. You need to put in a small hygrometer in it. The thermometer works great but for the last 3 days could not get humidity to increase more than 60%. I put a small sponge right under the vent and added water with a seringe through it. Got to increase the humidity. Next time I will put only 10 eggs in it. It's a bit crowded for 13 chicks in there with the egg shells and sponge.
Trustpilot
1 week ago
1 month ago