


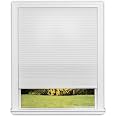
Redi Shade No Tools Easy Lift Trim-at-Home Cordless Cellular Light Filtering Fabric Shade White, 30" W x 64" L, (Fits windows 19"- 30")
Details
- MaterialPolyester
- Product Dimensions64"L x 30"W
- BrandRedi Shade
- ColorWhite
- OpacityLight

Description
🏡 Elevate your space with effortless style and smart comfort!
- CORDLESS KID SAFE DESIGN - Sleek cordless lift mechanism ensures a clean look and ultimate safety for your family.
- SOFT LIGHT FILTERING PRIVACY - Elegant spun lace fabric gently diffuses sunlight while maintaining your privacy and style.
- TAILORED FIT TRIMMED BY YOU - Use the patented trimming guide to perfectly size your shade for any window 19"-30" wide.
- ENERGY SMART HONEYCOMB FABRIC - 9/16-inch cellular design traps air to keep your space cozy and reduce energy bills.
- EFFORTLESS NO TOOLS INSTALLATION - Peel, stick, and go—no drills or brackets needed for a flawless setup.
The Redi Shade No Tools Easy Lift Cordless Cellular Shade offers a customizable, cordless window covering solution that installs in seconds without tools. Featuring energy-efficient honeycomb fabric for insulation and soft light filtering for privacy, it fits windows 19" to 30" wide and is designed for safe, easy operation in any room.


Specifications
| Material | Polyester |
| Product Dimensions | 64"L x 30"W |
| Brand | Redi Shade |
| Color | White |
| Opacity | Light Filtering |
| Recommended Uses For Product | Indoor |
| Specific Uses For Product | Window Shade |
| Room Type | Kids Room, Kitchen, Bedroom, Home Office, Dining Room |
| Operation Mode | Manual |
| Special Feature | No Tools Install |
| Included Components | (1) Shade, (1) Patented Trimming Scale and Guide, (1) Instructions |
| Shape | Rectangular |
| Number of Items | 1 |
| Pattern | Solid |
| Item Weight | 1.5 Pounds |
| Product Care Instructions | Spot Clean Only |
| Closure Type | Cordless |
| Size | 30 Inch x 64 Inch |
| Mounting Type | Inside Mount |
| Number Of Panels | 1 |
| Water Resistance Level | Not Water Resistant |
| Manufacturer | Redi Shade |
| Part Number | 3511052 |
| Item Weight | 1.54 pounds |
| Country of Origin | USA |
| Item model number | 3511052 |
| Is Discontinued By Manufacturer | No |
| Style | Easy Lift Trim-at-Home Cordless Cellular Light Filtering Fabric Shade White, 30 in x 64 in, (Fits windows 19"- 30") |
| Pattern | Light Filtering Fabric |
| Item Package Quantity | 1 |
| Number Of Pieces | 1 |
| Special Features | No Tools Install |
| Batteries Included? | No |
| Batteries Required? | No |
Reviews
V**T
They look real nice and are fairly easy to install
Loving these window blinds! I installed the first one about five months ago and I love it. Recently I decided to go the same route for the other windows, the best decision I could have made.Installing the blinds is fairly easy. The most challenging part, so to speak, is trimming them to size. I used a large kitchen knife with teeth. Even if the newly cut edge might not be perfectly straight, it looks perfect once the blinds are installed.To install I used additional two sided glue tape to enforce the adherence of the blinds. They do come with their own sticky tape, however, based on reviews, the original glue tape is not holding properly. Therefore, I first wiped off the wall surface with alcohol to remove any dust or oily spots in order to secure the best adhesion possible. After securing the tape onto the wall I used a hair dryer to heat up the tape, then, using a coaster I pressed as hard as I could for a maximum bond. Once the tape installed I glued on the blinds. I am happy to raport that all the blinds are being held into place with perfection. They operate smoothly and none moved or shifted out of place.I am also very fond of the amount the light these blinds allow through. While they offer perfect privacy, there is still a fair amount of light coming through. Initially I ordered one blind to try, followed by two other blinds, then five others. They are exactly what I want from every single perspective, I couldn’t possibly be more pleased.
E**U
Redi Shade No Tool Easy
You have to leave the blinds on for 24 hours. Before you pull down to open. When you open them. They are so pretty. I’m going to buy two more for the living room
A**R
Easy install, good quality, decent temp control, USE 3M VHB 2-SIDED TAPE
Quality is good for the price. Note that this is the CELLULAR version which means the shade design includs cells or pockets, which seem to filter more light while also helping with temperature control and blocking more heat from entering the home. (The same company also sells a PLEATED version which appears to not offer the same function of filtering light/heat.) The pull-down/lift-up function works great, no pins or clips required. If the shade position ever becomes uneven, simply raise the shade back to the up position and then pull back down to "reset" it, as the instructions indicate.Cutting down the shade to fit the width of your window is no problem. As the instructions state, measure your window WIDTH three times (top, middle, and bottom), and use the narrowest measurement when you use the included cutting guide to cut down the shade on each side (left and right, using your width measurement as your cutting point on each side). MEASURE MULTIPLE TIMES to be certain you have the right measurement. Then firmly secure the shade to the floor, apply the plastic cutting guide (included), place the slit over the exact position indicating your window width (for instance, "42 3/4") and then use a short, sharp, smooth blade kitchen knife to saw/rock back and forth until you cut all the way through. Repeat this on the other side of the shade, at the same measurement marker on the ruler. Once you've cut down your shade to the appropriate width, hold it up inside your window frame (top, middle, and bottom) to make sure it's not too wide. (It's going to be easier to cut it down further now than after you've installed it!) Then pop in the bar-ends (included) into the cut ends to finish the base of the shade.Adhesive: THERE IS A GOOD SOLUTION to the many problems others have mentioned in the reviews for this product.. DO NOT WASTE YOUR TIME RISKING TO INSTALL this shade using the pre-installed adhesive tape. Instead, I STRONGLY recommend searching Amazon for a 3M "VHB" 2-sided tape (usually back tape with red backing), preferably 1" width, and at least as long as the length of the shade. This should cost you about $9 or so. Order the tape at the same time as you order the shade, and don't attempt to install the shade until you have the 3M VHB heavy duty 2-sided tape (NOT SQUARES). Trust me on this from experience. Now, assuming you've purchased a roll of high quality (3M VHB heavy duty) 2-sided tape, and you've cut your shade down to side: REMOVE the backing from the adhesive tape that came pre-installed on the shade so the sticky tape is exposed. Now, unroll your 3M VHB 2-sided tape and CAREFULLY extend the tape from one edge of the shade to the other, applying it DIRECTLY onto the factory-adhesive tape, and firmly press along the whole way to make sure it's firmly attached with minimal air bubbles. (To make it even more secure, you can now blow a warm hair dryer directly onto the tape to heat up the adhesive, just for 15 seconds or so, and then press it down again firmly.) IMPORTANT: DO NOT REMOVE THE 3M VHB tape backing yet, and DO NOT install yet. Let the shade sit for 12-24 hours so the adhesive forms a super strong bond. It's better to take your time on this and ensure that it holds than regret it later! After you've let it sit for a considerable amount of time, clean the window frame / area of any dust, dirt, etc. (use alcohol if necessary), especially the area where you'll be attaching this shade, and let it THOROUGHLY dry. Finally, remove the 3M VHB 2-sided tape backing from the entire shade. (Optional: you can now use that same hair dryer technique once again, this time on the exposed adhesive, to warm it up and increase its ability to bond.) Now, very carefully press the shade in EXACTLY the position you measured from. HOLD IT IN PLACE for as long as possible, periodically shifting your hands (left and middle, middle and right, etc) so you're evenly distributing pressure, holding the shade and its adhesive against the surface to form a super-strong bond. Periodically shifting your hands, and pressing as firmly as possible, for as long as 5-10 minutes (or more!) will greatly enhance the bond, and decrease the likelihood that your shade will ever fall down unexpectedly.Good luck!
T**.
Disappointed
03/05/18 Update: the shade that was replaced broke AGAIN. The unreliability of these shades forces me to change my original review from 4 stars to 1. While the idea and price are great, the product just doesn't deliver. I can't reccomend these shades. Just spend a little extra for quality.11/01/17 Update: It's been almost 4 months since I've ordered these and I have ordered more. Unfortunately, one of the blinds did break so I contacted RediShade because they state that they will "run through a brick wall to make things right" if they're customers are dissatisfied in any way. They responded to my email within a few hours and sent a replacement the next day! I am very happy with this company and the fact that they actually do stand by their product. I will definitely be using redi shade for all of my window treatments.Just received and installed this today. So far, I love it!! We cleaned the top trim of the window really good and that thing is NOT coming down. For the reviews that say it's not sticking, I have to assume they didn't clean the trim because that baby is STUCK on ours. It would take some serious work to get it off. Cutting to size was a piece of cake and install was even easier. The reason im giving 4 stars is because I ordered what I assume was an "open box" item where the description assured no damage to the actual item but just that the original packaging had some damage. Unfortunately the blinds did have some minor damage, a small dent on the top plastic and a tiny crack on the side but I just made sure the damaged side was facing inward so it will never be seen. Amazon could maybe do a better job inspecting open box for a more accurate description. Other than that, I am EXTREMELY happy with this purchase and would absolutely reccomend it to others.
Common Questions
Trustpilot
3 weeks ago
2 months ago
