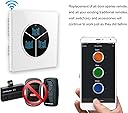
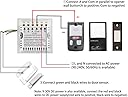
I agree with a previous review. I was going to give 4 stars but price is great and functionality is excellent. Deserves 5 stars. Here's another lengthy review, but hopefully it will save you some time and frustration when you set it up in your garage. Overall, the LT3 device is very versatile. You can configure it to control 1 door or up to 3. I used it for my garage which has 2 doors. You have to be able to do a little bit of tinkering to set it up, but it isn't too difficult (especially when there are reviews like this). I have 2 Genie openers, but you can use this LT3 on almost any brand that has a standard 2-wire push button. Here are some highlights of my installation. I hope it helps you. 1. I have 2 existing wall buttons, one for each door. The LT3 device can replace those, but it requires power, and it has a funky shape not too conducive to be placed into any standard electrical or switch box. I decided to leave my wall buttons alone and use the LT3 device purely for connecting to WiFi and for remote access via the phone. This saves some frustration in running power to the wall switches (and the unsightly power cable). I placed the LT3 on top of one of the garage door openers, and AC power is readily available where the opener plugs in. I know that I won't get to push the nice LT3 buttons, but I already have working wall buttons so it's no big loss. Also, my Genie wall switch has a separate button for the light and a lock switch. So it makes sense to leave those intact. 2. You can use either AC or DC to power the LT3. I chose to use low voltage DC because the LT3 will essentially just sit on top of my opener motor, not in an electrical box. I don't want 110V AC running to it and then accidentally shocking myself. I found an old 12V DC power adapter for something I don't even remember, and just cut off the connector at the end and stripped the wires. Plug it in and use a volt meter to figure out which wire is positive and hook it to the RED LT3 wire. The other negative/ground wire goes onto the black LT3 wire (you'll also use the black LT3 wire for open/close detection). Secure the wires with small wire nuts or electrical tape. If you don't have a spare 12VDC adapter, you can buy one from Goodwill or used electronics store for cheap. Make sure you use a physically small power adapter. Since the outlet is on the ceiling, a bulky adapter could fall out of the socket from its own weight. If you want to use AC power, that's fine. Just find any old 2 prong extension cord and cut off the end, and strip the wires. The AC wires go into L/N sockets on the LT3. Know that the screws are unprotected, so it could be a shock hazard. 3. You will want the Smart Life app. I already had it to control some smart plugs in the house. Once you have Smart Life set up and registered, you can press the "+" key to add a new device. Scroll down all the way and choose Other Products. It will then wait for a connection. Power up the LT3 and hold the Button C for 10 seconds until the wifi symbol blinks. You should now see the device on your Smart Life app. Once connected you can click to the 3 big buttons on the app screen, and the "gate open" status at the bottom. You can edit the name of each button (see my photo) as well as the LT3 itself. I called the LT3 "garage controller" and Button A is "big garage door" while Button B is "small garage door". 4. Unplug the garage door opener while you are wiring. I used a spool of 20 gauge bell wire (twisted red/white solid copper) to do all my connections. It was about $10 for 100 ft. But you can use any low voltage wire that you have handy. Old telephone wire works too. 5. Find where the wall button connects to the garage opener motor. For most openers, there are 2 wires coming from the wall button and goes into 2 contacts on the motor housing. Run 2 wires from the LT3's Com / A ports to these same 2 connections. If you want to control a second or third garage door, you will have to run 2 wires from Com / B (and Com / C) to the second and third garage doors. I ran these wires into the attic and down to the other opener, but you can also just staple it to the ceiling. 6. Once you have the buttons wired, plug in the garage door openers to test. Mine worked pretty much on the first try. Make sure your wall buttons still work, your app buttons work, and any remotes in your car or homelink buttons in the cars still work. If you have a light button on the wall switch, make sure that still works too. 7. I use Google home to connect to Smart Life. If you already had Smart Life connected to Google home, you will have to disconnect it and then reconnect in order for Google home to find the new garage door controller. To operate the doors, say "OK Google, turn ON big garage door", or whatever you named the button. Google Home at least at this time doesn't understand "open" or "close", but you can say "turn on" to toggle open and close. It is just like physically pressing the wall buttons. 8. Now the dreaded (and desired) open/close status. First, you will need to buy a reed switch or magnetic sensor to detect open/closed status. These are 2 part switches, where one half has a reed switch sensor, and the other half is a magnet that triggers the sensor. They are used in home security systems to detect window open/close and they are very affordable. I bought 2 for $8. If your garage door opener already has limit switches (either mechanical contact or magnetic reed switches), they likely cannot also be used for the LT3. Save yourself some tinkering and just buy the additional reed switches. You will need one for each door you want to detect open/closed status. I chose to mount them on the rail and carriage of the opener (see pictures). Or you can mount them on the door and front wall. The sensor part is attached permanently to the rail and doesn't move. The magnet is attached to the carriage and moves. When they line up, the 2 wires marked Common and NC (normally closed) are shorted. You will want to use these contacts for the LT3's green and black wires. 9. The LT3 can open and close 3 separate doors independently, but it has only 1 open/close status indicator. What I did to get around this limitation is to wire all the open/close reed switches in a series. I figured the only time I need to check the open/close status is when I am away from home. And in almost all cases, I just want to know that all garage doors are closed. Wiring the reed switches in a series ensures that the green / black wires are shorted (and app says "gate closed") only if ALL doors are closed. App will say "gate open" if ANY door is open. You will have to figure out which one is open by pressing a combination of the buttons. For most of you, you will use one door more often than the others, so it won't be hard. With 2 doors, it only takes a maximum of 3 tries to make sure both are closed remotely. With 3 doors, it's a maximum of 7 combinations. Not ideal, but since there is only 1 open/close status indicator, this is the only way to do it. It is still better than not knowing whether you left any of the garage doors open. Hope this helps someone. See attached wiring diagrams and pictures. Cheers.