Buy anything from 5,000+ international stores. One checkout price. No surprise fees. Join 2M+ shoppers on Desertcart.
Desertcart purchases this item on your behalf and handles shipping, customs, and support to Spain.
๐ด Power up your radar game with stealth and style!
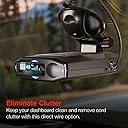
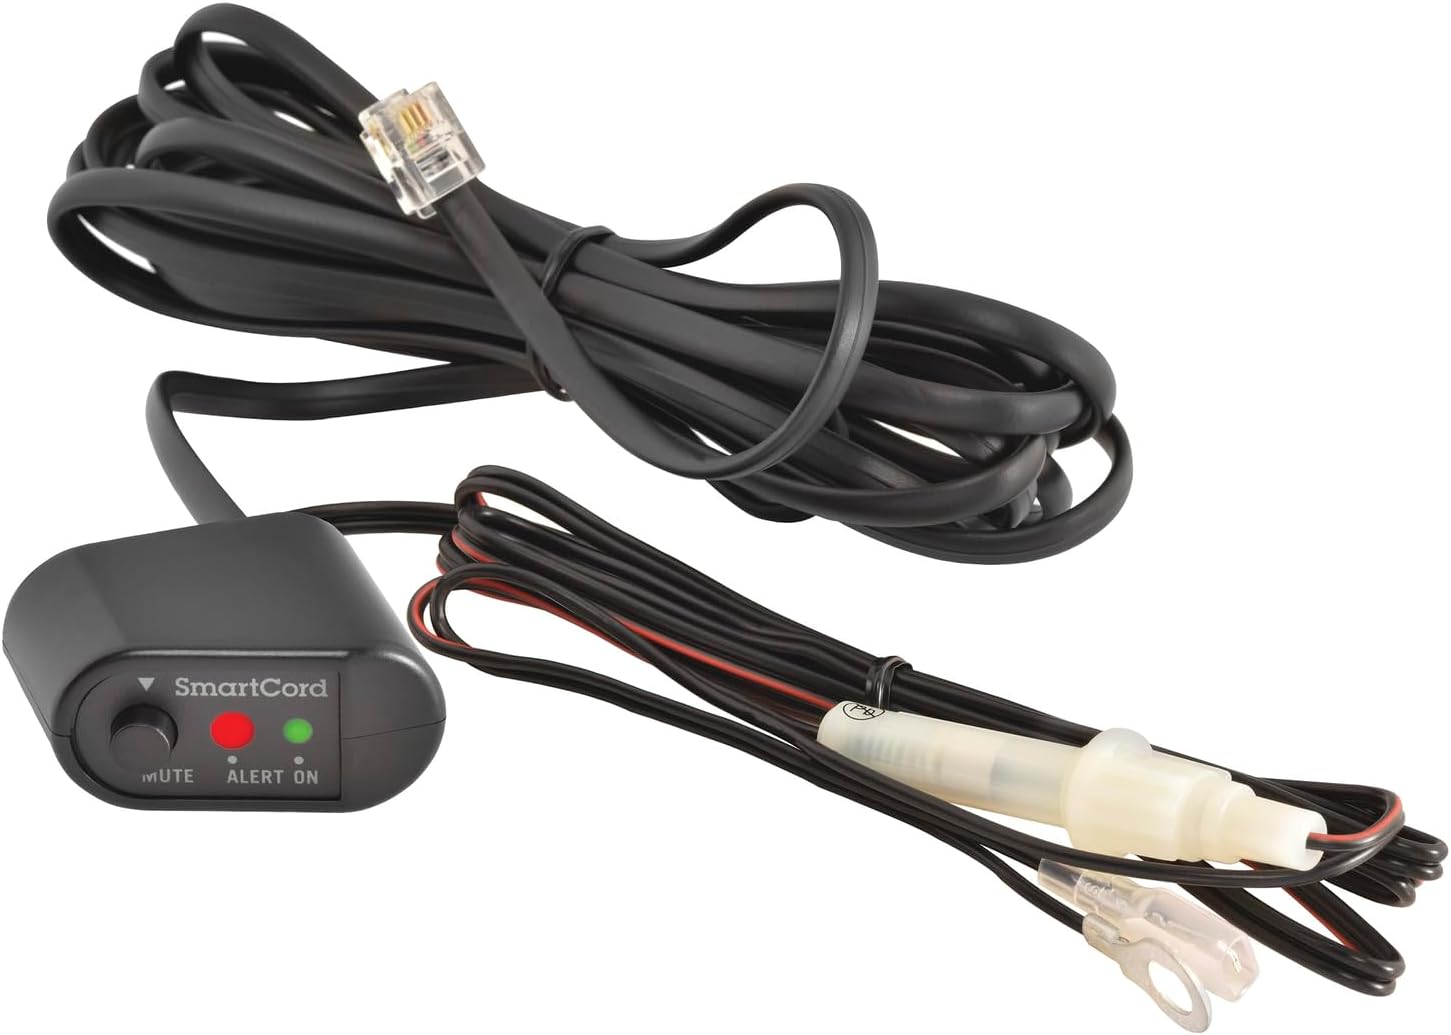
The Escort Radar Detector SmartCord Directwire is a premium hardwire power solution designed to seamlessly integrate your Escort radar detector into your vehicleโs fuse box. Featuring a red LED power indicator, a mute button, and visual alert lights, it enhances driving convenience by eliminating bulky cigarette lighter plugs and enabling discreet operation with dark mode. Compatible with a broad range of Escort models, this 9-foot cable kit offers professional-grade installation flexibility and a clutter-free interior aesthetic favored by discerning drivers.


| ASIN | B0003NN83K |
| Best Sellers Rank | #13 in Radar Detectors |
| Brand | Escort |
| Built-In Media | Smartcord |
| Compatible Devices | [Current generation ESCORT windshield mounted detectors] |
| Customer Reviews | 4.7 out of 5 stars 950 Reviews |
| Display Type | LED |
| Frequency Bands Supported | 10.525 GHz, 24.125 GHz, 34.7 GHz |
| Global Trade Identification Number | 00737795275008 |
| Item Dimensions L x W x H | 1.5"L x 3"W x 7.2"H |
| Item Weight | 3.2 Ounces |
| Manufacturer | Escort Radar |
| Mfr Part Number | 0010057-1 |
| Model Number | 0010057-1 |
| Power Source | Wired to Fuse Box |
| UPC | 737795141044 758003013212 737795275008 |
| Unit Count | 1.0 Count |
| Voltage | 12 Volts (DC) |
| Warranty Description | 1 Year Manufacturer |
F**F
C5 Corvette Both Cords Barely Long Enough and No Power?
Not having the hanging, coiled power cord is so much less stressful driving top down by cops. The remote head unit is nice and the weird shape actually fits the C5 ashtray area and is small enough to hide inside and shut the ashtray compartment door. Be advised the ashtray is hardened plastic so donโt reef down too hard on it in a vise when you drill and dremel an access hole for the large in-line bus fuse or it will crack like mine did. Theyโre inexpensive on Amazon to replace. The power cable to the accessory jack by the Body computer and the phone jack to the Radar Detector head mounted by the rear view have about one foot of slack which you need because the head unit is in front of the ashtray in front of the entire radio bezel. Itโs a tight fit. So the location choices of the head unit are narrow. The ashtray is blocked by your hand on the manual shift so I have it all the way right and itโs still barely visible. A cup in he cup holder will block it entirely. Wish the remote head had a Report button not just mute. All in all a much sleeker look and hides the radar detector better. If the phone hack cable was just one inch longer it wouldnโt be so tight removing the Radar Detector from the car for overnight parking. Itโs a great value because nobody else is making a cable with the remote mute head. If the radar detector has no power, you probably have MANUALLY TURNED OFF THE POWER. You will have turn on power then MANUALLY TURN ON POWER on the radar itself. Seems obvious but after plugging it in and having power come on every time, I was perplexed as to why I was getting no power and suspected this cable. Not the case.
S**Z
Works great 5/5!!
Works great and haven't had any issues with it for years!
J**.
Great Product and Easily Custom Installed.
I bought this so I can hard wire my Passport Max 2 to my car's electrical system. It works exactly as you'd expect it to, and it provides an easy way to quickly mute the detector when it picks up random signals that aren't actually threats. My unit picks up automatic doors and this gives me a quick way to mute and lockout unwanted detections. This cord also features a light to tell when the system has power and it has another light that flashes yellow when it detects something. The cord itself is a bulky button and pcb setup inside a not so easy to hide box that clashed with the interior style of my car. I don't like having cords everywhere, and I don't like how aftermarket products never match the look and feel of the car, so I ended up taking my SmartCord apart and installing it directly into my dash. What I did to install this cord was install it to only come on when the car is on (not accessory). I then took the dash trim piece off where I wanted to install the buttons, measured everything and traced out where each button should go. Then I drilled the necessary holes and took the pcb out of the cord and mounted it inside my modified dash piece. I used a epoxy to hold everything in place so nothing comes off when I hit the mute button. Then I soldered all the right connections back to the cord I had to cut of (so it would fit where I wanted). Lastly, I took the faceplate from the original cord and glue it to my traced outside on the dash piece. It doesn't look 100% factory installed, but it looks far better than the original cord would have.
J**L
Works great, but the "hook and loop" used to adhere the control is not ideal.
I used this to direct wire my Escort radar detector into my 2013 Golf GTI. PROs - Easy to hard-wire your detector and remove the unsightly coiled cord that's hogging your 12v power socket. - Cables supplied with it are generously long, should be able to install a detector just about anywhere you need. - The cable to the detector is flat and easily squeezes into tight spaces around windshield to hide from view. - The controller is exactly the same as the SmartCord that came with the original detector and allows you to see the status of the device and remotely mute alerts. CONs - I wasn't a fan of the hook and loop fastener used to mount the SmartCord controller onto the car. It sticks well to both the car and the smart cord, but they feel like they're only loosely connect to each other. In reality it's never fallen off and I doubt it ever will, it just feels like an unprofessional mounting option. I would probably skip the hook and loop if installing again and just use some good double-sided tape. My install was easy and comprised of the following steps: 1. Determine the locations of the various components 2. Route the wires appropriately 3. Connect to power and ground Where is the fuse box? -- Driver's side, open the door and it's behind the panel in the center console. Where I wanted the radar detector? -- Horizontal center of windshield, several inches above the dash to give a clear line of sight to the rear window Where I wanted the control panel? -- I placed mine on the lower center console below and behind the steering wheel. This isn't exactly ideal as I can't see the lights as they're blocked from view by the steering wheel, but I can easily reach the Mute button by feel, and that's the most important feature for me. Routing the cables was surprisingly easy. The cord to the detector is flat and easily fits between pieces of trim so it can be hidden. I specifically placed the SmartCord control in a location that made it easy to route wires without removing trim panels. I fed both input power and detector output cords through the underside of the dashboard in the drivers foot well, and into the fuse box. I then routed the detector output lead up and out the top of the fuse box, around the bottom of the windshield pillar, and along the gap between the dashboard and the windshield until it reached the center. It took a bit of tugging along the path of the cable, but eventually I had enough length of cable to reach the detector and enough slack to allow me to hide it. I just poked the cable into the gap along the bottom of the windshield with my fingers, squeezed it between trim at the bottom of the pillar, and down into the fuse box. I had quite a lot of cable left over, but I'm sure all cars and locations being different they supply enough cable to cater to all. I just used electrical tape to tie up the excess cable and tape it down to the side of the fuse box to stop it rattling around. To connect to the power supply in my vehicle I used a Bussmann ATM Mini Circuit Converter (Add-a-Fuse) to expand an existing ignition-controlled fuse slot so that the detector only comes on when the ignition is on. The only tricky thing to be aware of is that these fuse adapters only work one way round, so if it doesn't work the first time you need to flip it around and try again. Finally I needed to connect the negative lead somewhere. Most (all?) vehicles run the battery negative feed throughout the entire chassis, so all you need to do is find a (non-structual) metal screw / bolt that can be used to attach the negative lead to the chassis. I also used a multi-meter set to continuity mode just to be doubly sure I had a valid ground connection. In my case the attachment point for the chassis was quite a way from the positive fuse connection, so I just split the power cable down the middle (it's built to do this, don't worry) until I had enough cable to route the negative feed to a valid mounting point. I'm very happy with this kit and so glad to have free access to my 12v power socket again.
M**S
Works great with the 8500 x50
I purchased this product to use with my Escort 8500 x50. Once I got it installed properly it has worked great and is much better than cigarette lighter outlet options I've had to use in the past with radar detectors. I am somewhat knowledgeable on installing things in the dash of a car. I've done a few stereos in the past and "sat in" on a few remote starter installs with a friend in the past, but I by no means am an expert at all things electronic/wiring. This note is for those that are like me and maybe it can make your install go a little faster/more smoothly. 1st, I'd highly recommend using a fuse tap like some other reviewers have recommended. In my case, I bought the Bussmann BP/HHH ATM Add-A-Fuse and it has worked fine though, if you have a Milan or Fusion (I have a 2010 Milan), you can plan on not being able to put the cover back on your foot area fuse box on the driver's side (note: I did zip tie mine over the fuse box). Next, I'd recommend this step. The instructions included with the wire are pretty sparse. If you don't know what you're doing, you'll be Google-ing and looking for reviews for help. Here's the secret, find your ground BEFORE you do the rest. Seriously, that's what took me the longest. I realize people that have done plenty of electrical stuff dealing with grounds before are going to laugh at this but if it saves someone else headache/time in their cold garage in the winter like me, then it's worth it :) So, what you'll want to do is use the add-a-fuse per its instructions with which side is your "original" fused device and which is your accessory (radar detector) device side. Use a low amp fuse for your radar detector. They don't take much (look up the recommendations for your model). Next, take the wire for the ground that has a metal loop on it and touch it around to all the screws and such near your fuse box under your dash. When the detector powers up, you've found a proper ground! In my case, I had run all the wires, then it didn't power and I thought it was something with the fuse that was wrong. I went back and forth on things while everything was all spread apart and I could have saved myself a TON Of time had I known this. Once you have a screw that you know is a ground you can use that one. Just run your smartcord however you plan on doing to mount your detector and attach to that screw. Another reviewer posted this tip and I'm going to use it as I had temporarily mounted a new screw and nut to a piece of metal in my dash and it wasn't a good sized screw to use (too long, kind of too thin etc.) but the ground wire has a SMALL loop which didn't seem to fit any screws I had in my dash. If you clip part of it, you can mount it under 1 side of the screw and fit it on larger ones. I don't know why I didn't think of this, but it makes total sense, so the next time I clean my car and vacuum, that's what I'm going to do. As far as where to run the cord... I have a 2010 Mercury Milan (same as a Fusion) and I ended up running the mute button part to the instrument cluster area to the right. It's easy and inconspicuous to reach and mute and likely wouldn't be seen by an officer with the steering wheel turned a little bit. Plus, it's just above the steering wheel in my peripheral vision driving so when it blinks, even if I have the audio too quiet or my stereo up too loudly to hear the detetctor, it catches my eye. This is REALLY helpful and has already given me early warning of radar ahead. Then, from there, I ran the rest of the wire through the corner moulding, to the headliner and across to the right side of the mirror. I used the standard "visor clip" Escort 57-000027 Visor Clip Mount for Radar and Laser Detectors there to mount my detector. This keeps it out of view mostly from thieves (with the sun tint and dots at the top of the windshield) and it's not visible if an officer is standing next to your car. This has worked out great. The only bummer for me is that I'm considering Escort Live once they release a SmartWire direct cord for it, so I bought this now and may end up buying that later once it's released. If you haven't bought one yet and want to wait, you could do that. I think the last thing I saw was like Q2 this year (2012). We'll see. Aside from that, it works great as advertised. The directions could be better, but hopefully these tips help save you time. I completely love having direct wire vs. 12v plugs; no cord messes and nothing getting bumped.
L**.
Perfect if you need a replacement
This is OEM product and itโs a great product.
D**.
Very easy install and works great!
I got this so I could hide the cord to my radar detector better and this hard wire kit did the job! Just gotta wire the positive to the radio fuse and the ground to a metal spot screwed in. Then the smart mute part you have enough wire to put it anywhere in the drivers area. The Velcro that comes with it doesnโt really stick well so I just jammed it between my steering column and dash panel and itโs holding there well. But Iโm sure you can get sticker tape and mount it wherever you like. Then the wire to the detector is very long. So long you could put the wire all the way to the passenger side! Overall very easy set up and very clean looking once all done!
G**E
No wires in site
Excellent product. Direct hot wire to the Redline 360c.
R**K
Works like a charm
Works like a charm! My car looks a lot cleaner now without the coiled wire hanging down to the AC power source. Easy to install, especially if you buy an "add-a-fuse" available on Amazon for just a couple of bucks. This prevents you from having to cut and splice. I recommend it!
A**R
Great product. My car looks great
Great product. My car looks great!!
D**N
Works perfectly for my 9500xi. I used this kit ...
Works perfectly for my 9500xi. I used this kit to hide the remote and the cords. Ended up flush Mounting the remote to a pannel in my car
S**D
make your Escort wire free and free up a cigarette lighter power port
This is great. Tossed my old coiled cable and wired this into a hidden wireless look. However, the end going to the fuse box was too short so I had to cut the ends off and attach extra wire. Manufacturer should not be stingy with the cord reaching to the fuse box, all of our autos are different. It works great though, go for it.
C**E
Great and quick
It us great and easy to install
Trustpilot
2 months ago
4 days ago