Buy anything from 5,000+ international stores. One checkout price. No surprise fees. Join 2M+ shoppers on Desertcart.
Desertcart purchases this item on your behalf and handles shipping, customs, and support to Spain.
🚽 Upgrade your flush game with KOHLER’s precision-engineered valve kit!
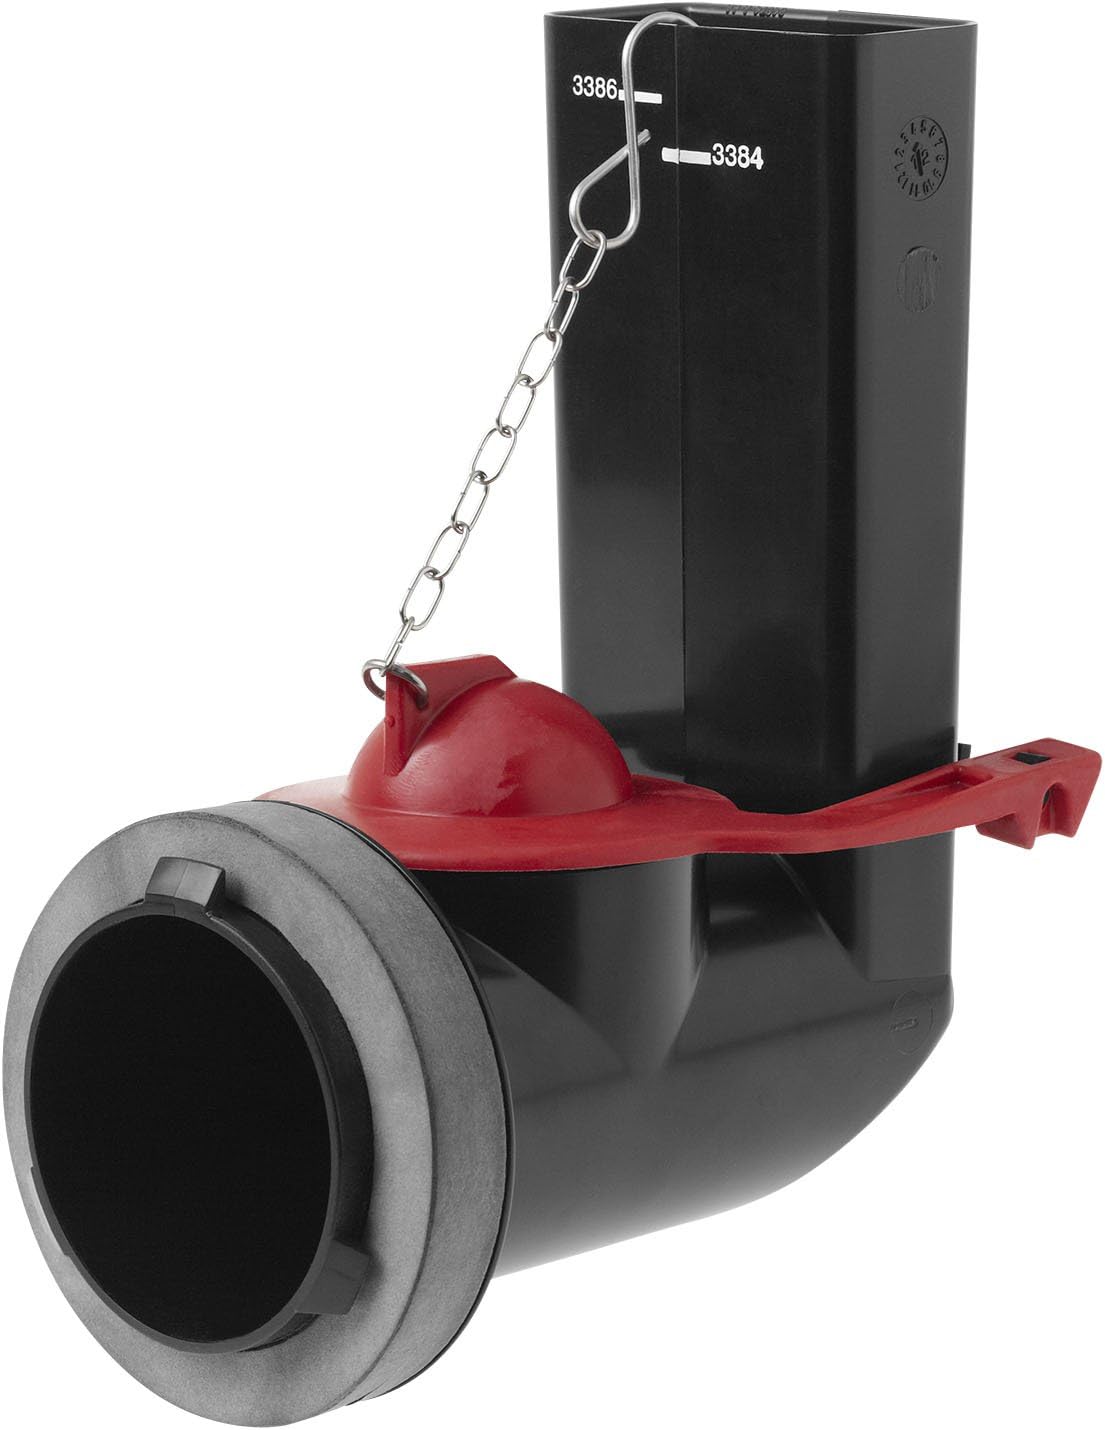
The KOHLER 471147 Flush Valve Assembly Kit is a genuine, brass-constructed replacement part designed for quick and easy installation. Engineered by KOHLER in the USA, it guarantees a perfect fit and long-lasting performance backed by a 1-year limited warranty, making it the trusted choice for maintaining your toilet’s optimal function.


| ASIN | B003H49MLY |
| Best Sellers Rank | #122,908 in Tools & Home Improvement ( See Top 100 in Tools & Home Improvement ) #163 in Toilet Flush Valves #10,721 in Kitchen & Bath Fixtures |
| Brand | Kohler |
| Brand Name | Kohler |
| Connector Type | Barb |
| Customer Reviews | 4.5 out of 5 stars 698 Reviews |
| Exterior Finish | Brass |
| Global Trade Identification Number | 00650531581600 |
| Included Components | FLUSH VALVE ASSEMBLY KIT |
| Inlet Connection Size | 10.35 Inches |
| Inlet Connection Type | Barb |
| Item Dimensions | 8.5 x 10.35 x 4.95 inches |
| Item Type Name | Flush Valve Assembly Kit |
| Item Weight | 6.7 Ounces |
| Item dimensions L x W x H | 8.5 x 10.35 x 4.95 inches |
| Manufacturer | Kohler |
| Manufacturer Part Number | 471147 |
| Material | Brass |
| Material Type | Brass |
| Model Number | 471147 |
| Number of Ports | 2 |
| Outlet Connection Size | 10.35 Inches |
| Outlet Connection Type | NPT |
| Size | 0.75 x 3.25 x 10.00 inches |
| Specification Met | not_applicable |
| Thread Size | 2-1/2 inches |
| Thread Type | NPT |
| UPC | 650531581600 |
| Valve Type | flush valve |
B**S
Good OEM part and, yep, a bit tricky to install
Instructions to recommend wetting the o-ring gasket and I soaked it underwater for 10 or so mins as another reviewer recommended. That certainly helps but it does indeed still take significant pulling force towards the “front” wall to get the three plastic teeth seated deep enough to allow then turning it into place. The three plastic teeth are fairly robust but it is a bit of an anxious moment when pulling hard and turning the smaller plastic bits into place against the unforgiving porcelain. I found it helpful to (without the seal) mark in pencil on the “back” wall the exact angle position of the piece where the three teeth perfectly align with the three areas that accommodate the teeth, so I knew it was in the best position when pulling hard with the gasket on. Can see why the clamp squish and freeze method would be helpful to eliminate the need to pull hard while installing. Works well when installed. OEM kohler box and parts. Good that Kohler moved away from using this part in subsequent models. It’s a relatively unique plastic part not available in local hardware stores and when your old part breaks (the plastic teeth on my 23 year old original part broke while I was trying to replace the flapper) you want the most essential parts of your toilet that occasionally need replacing to be parts that are available ASAP in local stores.
E**F
Hard to install unless you know a trick.
I had the hardest time installing this until I came across a video that a 90 year old man did showing how he got it on. I'll save you the trouble looking for the video...this is how to do it. 1) take off the rubber gasket. 2) place between two pieces of scrap wood and compress it using clamps. 3) freeze it overnight 4) when frozen and ready to use immediately, take out of clamps and install. Super easy peasy with the gasket compressed. Remember that the gasket thaws back to normal thickness quickly and it gets put on at a 30-45° angle to the right. A previous repair by a previous homeowner had snapped off the tabs on the assembly kit so make sure not to make that mistake. My toliet tank seemed to have only 1 exact positioning to get it in there. I ended up having to refreeze the gasket, because I fidgeted around with it too much the first time. Once installed the gasket thaws into a nice super snug fit.
S**7
factory replacement, perfect fit, works as intended
exactly what I needed, perfect factory replacement!
C**N
Cheap OEM Fix For a Big Issue - If You Can Install it
I bought these after both of my 20 years old Kohler Raphael toilets started leaking -at the same time!- After so many years submerged in water, the gasket had expanded to the point it started to make cracks on the weakened plastic tabs. In one toilet, the Flush Valve just came off completely from its socket, rendering the toilet unusable. These are exactly the same parts that came with the toilets and should last for another 20 years (there is hope) Now onto the installation, the hard part. This piece has a very tight fit with the tank's wall, thanks to its massive gasket, and there is only one way to push it into it and then turn it to reach its final position. This could be really hard to do, needing a lot of trial and error an decent force to push the piece in. It can be really frustrating and you can damage the plastic tabs if not careful. Whomever in Kohler thought this was a good design was probably fired a long time ago. Or maybe not as it lasted for 20 years. Who knows Anyway. I'm not a fan of the freezing method some other reviewers explain here. These gaskets are not designed to be frozen, and in my view freezing them may alter their chemical composition, reducing its useful life. Also, they may break if not treated carefully when frozen as they have lost all its flexibility. Freezing them turns them into hard pieces of fragile plastic, and once they expand back to its original form, even very small cracks will become bigger, and the gasket less flexible (NASA learned this the hard way, back in the 80s) An alternative to freezing it and what Kohler somehow recommends -even if not directly, they just say to "wet it"- is to soak them in water for a few minutes. This will in fact expand the gasket a bit, which you would think is the exact opposite of what's needed, but what it does the most is to soften it. This gasket has some capacity to absorb water, its seal is provided in part via expansion under water. Once the gasket is soft enough, it will be easier to compress and just a decent amount of pressure and turn will install it easily. Think about a kitchen sponge: hard when dry, soft when wet. I learned this while installing it in the first toilet. After a few unsuccessful tries I noticed that after the gasket became wetter, it was easier to compress and I eventually installed it. So for the second toilet I accelerated this process by leaving the gasket in water for a few minutes. The installation was fairly easy and I did it at the first try, no issues whatsoever
N**A
It took a total of 2 minutes to install
After wasting several days trying to install an aftermarket generic part I realise I should only order original manufacturer parts. It took only TWO minutes. I did use a sturdy screwdriver to help push in place.
A**R
Installation Tip
This comes with a foam rubber seal which is about 1/2" thick. In order to install, the seal has to be compressed and the assembly rotated 45 degrees, which allows the 3 plastic retaining tabs to lock into place. I was unable to put enough pressure on the assembly by hand to compress the seal enough to allow the tabs to move into place. I was afraid to force it because of the possibility of breaking the plastic tabs. I solved the problem by putting the seal between two metal plates and compressing it in a vice until it was less than 1/4" thick. I let it set in the vice overnight, then put it back on the assembly where it retained its compressed state long enough to allow me to easily lock the tabs in place. After a few hours it had expanded enough to make a good seal and I turned the water back on and have had no leakage.
O**D
Product is fine, installation is horrific
This is the biggest pain to install. Seems simple enough, attach one end to the inside of the tank and go merrily on your way. But no. That foam ring is so thick that you can't do it, it won't do it. There is no possible way to get it done right out of the box unless you have some special, yet to be invented tool. I saw a video where a guy got it wet, applied clamps to the ring and then put it in the freezer over night--sounds way too extreme, until you spend 2 hours trying to make it work, then you will try anything, here is anything. It comes out of the freezer thinned down enough to work and it goes on. There has got to be an easier way.
J**N
Not hard at all to install
I installed this in about 10 minutes, which included the time it took to drain the toilet tank and remove the old part. The only hard part is that you are pushing the part and the gasket into the wall of the toilet tank where the hole is and then trying to twist it into place. So basically you are really using force to push it into the front tank wall as hard as you can as you twist it into the lock position. Grease the wall and the front face of the gasket with silicone if you need to and it is very, very easy to do and you won’t risk damaging the gasket. I am north of 50 years old and I did not have a problem at all. This was a direct OEM replacement for a Kohler 3386 flush valve. It includes the seal/gasket, along with the new Kohler flapper and the black pipe pictured. To remove the old part you push it toward the front tank wall, while sitting on the toilet backwards with the lid down (you are pulling it towards yourself). As you are pushing it against the tank wall, just turn it from 12 o’clock down to about 2 o’clock and it will release. The installation of the new part is basically the reverse. Align it toward 2 o’clock, pull it towards the front tank wall to compress the gasket into the wall of the tank and turn it up toward 12 o’clock. I did not do any special prep, other than coating the toilet wall along which you were spinning the part with silicone. It is best not to use Vaseline or any petroleum based products on the rubber gasket, as it will deteriorate it. Use silicon lubricant instead if you need it. Amazon sells just the seal separately and I would have saved money just buying that. For reference, it is part number 84676. If you need a new flapper, which is about 6 to 8 dollars, you may as well just buy this because you get a new black tube for about two dollars and that way if you break a tab trying to install it you still have your old one.
S**E
Tight fit
This worked but it was way to hard to install. The gasket is too thick. I had to clamp the gasket between two boards and freeze it. Then I installed it while it was still frozen and squished down. It expands and seals in a few minutes.
A**Z
Excelente Servicio
Todo bien, le quedó perfecto
M**I
Excellent
Fits perfectly and it does the job.
E**O
cumplío con las expectativas
muy bueno
C**É
Faire tremper le joint avant l'installation
Exactement ce dont j'avais de besoin. Très facile à installer. Il suffit de mettre le joint 10-15 minutes dans de l'eau tiède ou chaude pour le faire entrer plus facile. Ça prend juste un peu d'huile de coude
Trustpilot
2 weeks ago
4 days ago