We remain fully operational. Our teams are working around the clock to ensure your deliveries continue safely.

Descargar la aplicación


Servicios al cliente
Sobre nosotros
Copyright © 2025 Desertcart Holdings Limited
Descargar la aplicación

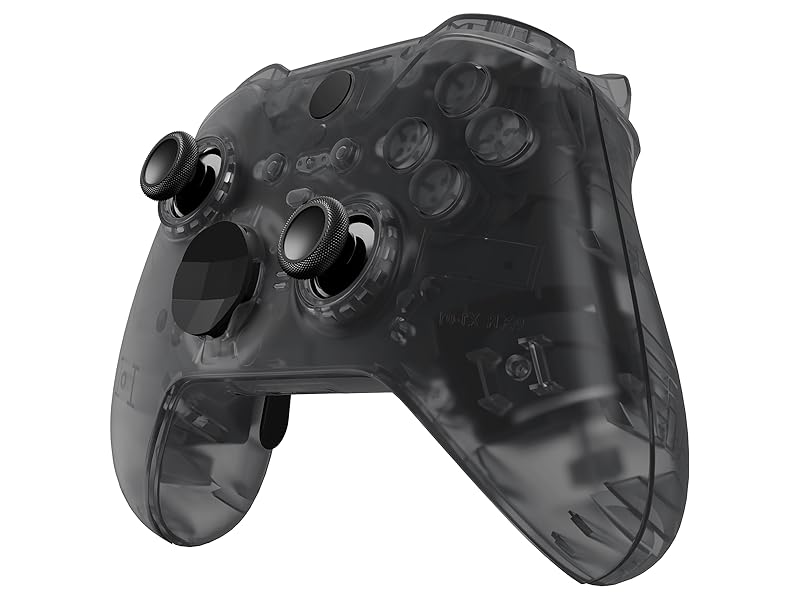
🖤 Level up your Xbox Elite Series 2 with style and precision — don’t just play, dominate in sleek transparency!
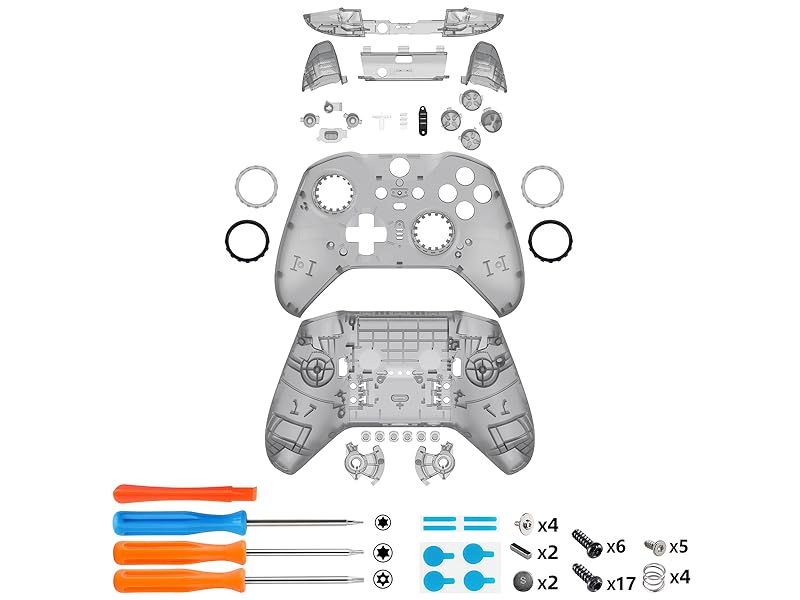
The eXtremeRate Full Set Shell Buttons kit is a tailor-made replacement for Xbox One Elite Series 2 controllers (Model 1797), featuring a premium transparent black shell and a full complement of buttons and plates. Designed for perfect fit and easy installation, it includes all necessary tools and spare parts, allowing gamers to refresh and personalize their controllers with a sleek, durable upgrade that restores premium feel and aesthetics.


| ASIN | B0F5QJ7M8N |
| Best Sellers Rank | #2,027 in Video Games ( See Top 100 in Video Games ) #5 in Xbox One Faceplates, Protectors & Skins |
| Customer Reviews | 4.5 4.5 out of 5 stars (241) |
| Date First Available | April 21, 2025 |
| Item Weight | 0.353 ounces |
| Item model number | QFJE2M004 |
| Manufacturer | Extremerate |
| Product Dimensions | 1.18 x 0.79 x 0.39 inches |
N**A
Revive that expensive controller
It was really easy to assemble and the instruction video was really helpful. Quality feels great, looks and feel way better than factory, color is just like expected. It includes all the tools you might need, and restore pleasure of using such an expensive controller as the Xbox Elite. It fits so great that you can mix-match original parts with this one and it will align and function great.
J**N
Perfect shell replacement for elite series 2 core controller
This full shell replacement kit for the xbox elite series 2 core controller was perfect. The original grip was peeling off the old shell and made the controller feel old and dirty. I didn’t want to replace the controller with a new one because the price and the controller still functioned well besides for the grips peeling off. The installation was quite easy while following the video the company provides on youtube. The new shell feels premium and looks great. I went with clear green for replacement on the red core elite controller and the red and green together looks alright although opinions differ.
F**A
All tools included and looks great
Came with all the tools needed to disassemble and reassemble the controller and came separated from the frame from the injection molding so no trimming needed. The quality feels good. The parts fit together just fine although I had a little trouble getting the triggers to accurately read and had to mess around with the way I put it together other than that it’s working great and it looks good
A**W
Great replacement shells for the price
I bought this kit as well as a purple faceplate so I could do a dual color look. I didn't want to have to dig deeper into the guts to do the buttons but at least I have the parts if I go that far. My only one gripe is that once you snap it together DO NOT pull it back apart. The plastic tabs on the inside break easily or bend and turn white. Other than that sturdy product and cheeper than OEM
C**3
Best, and most affordable option for a good looking, properly functioning shell replacement.
For $24.99, you just will not find a better option for a new XBOX Elite Series II shell, and that's the long and short if it... What may make this kit even better for some looking to purchase one for themselves, is the fact that this one in particular, includes EVERYTHING that you would need to perform a COMPLETE update of your controller! Which I am not sure, even if you were willing to shell out more money, you could even find to start with. I have already replaced mine once before (I know right... I am hell on a controller), and at that time, this kit did not exist, so I had to purchase the top and bottom shell, the triggers and bumper set, and the ABXY set, all completely separate of one and other, and it ended up costing A LOT!! Because of that though, I already had a set of Extremerate Chameleon (Blue/Purple bumpers, and ABXY kit, which I left in place, as I prefer the look with them, as opposed to everything being the same clear black (or grey, arguably) color. So I just needed a top and bottom shell replacement, and when it arrived, I opened up my controller, and cleaned everything up really well, and then put it back together using the new shell, and just held onto the other stuff, so I will have spares in the future, should I ever need them. As far as ease of use goes... Well, that is debatable, but I will give Extremerate their due, in so far as, they do have a very detailed YouTube instruction video, which absolutely makes all the difference in the world when it comes to tackling this project one's self. However... These controllers are very intricate little devices at the end of the day, and anytime you are attempting to repair anything that uses a combination of little tiny springs and screws.... Well, let's just say, don't do it around anyone who would feel disrespected if they were to hear quite an untold number of curse words let fly from your mouth! I personally, have a tendency to get very irritated, very quickly with projects like this one, and this controller repair - even in spite of my experience with doing a complete over-haul previously - was no exception. It's a pain in the a** no matter what, so just be prepared to concentrate very closely on this task as you are doing it, and also, it helps to place something underneath the area, that is white, or light colored in general (preferably a solid single color), so that when you drop one of the super tiny components - and you WILL drop one... likely more than one - you don't have to take the remainder of your day to find it, in order to continue moving forward with the project. Lastly, one more helpful hint, for anyone who actually bothers to take heed to this advice (and you should... but if you don't... when you drop something, or everything that you just put into place before getting it all secured into place... just imagine a guys voice saying "Hate to say I told you so")... When it comes time to put the magnets into place, the round ones go SOUTH side DOWN, meaning, the side with the "S" printed on it, gets placed downward, so that you do not see the "S" facing up toward you. And the bar shaped magnets, they are placed in such a manner as you should see the markings on them, facing UP toward you. And the sticky thingies they include to help the magnets stay in place, are not only an entire pain in the a** all their own, but really don't work very well to begin with, so... Remembering them as being such a pain the last time I took this task on, I also purchased some gel type Gorilla super glue, which I placed only a very very small dab of, in the place where each of the four magnets in total, get placed, and this little self addition to the process, made such a big difference! I was extremely pleased with myself for purchasing the super glue, and it takes no time flat for it to dry enough that the magnets will be in place even if you accidentally turn the entire bottom half of the shell upside down, which just makes life a whole lot simpler, in the process of trying to complete a project as inherently tedious as this one most certainly is for certain. Other than that, everything went really well. The only gripe I have, is that the very center, bottom-most "clip-mechanism", that helps along with the many others around the entire area of the top and bottom halves, to connect each of the halves together as a whole (which is the very last step of the project, after which, you can get back to gaming), just will NOT engage, and snap together with the top half, no matter how hard I squeeze that area of the controller, and try to get them to engage, or otherwise snap together. But, in the end, this is barely noticeable (meaning, no one else would ever notice it at all. I just notice, because I am the one who paid for it, and invested the time and effort to sit down and repair the controller... So yes, of course I notice!... However, this does not impede the functionality of the controller in any way whatsoever. Even the audio jack - which is located in this exact position of the controller - works just fine. Plus, I have a volume/EQ adjusting device that plugs into this spot as well, and with it plugged in to the controller, you definitely cannot see, or otherwise notice this minor frustrating detail at all, whatsoever, so, it's all good, right! Because even if Extremerate were willing to replace this kit with another one - which I have every belief that they would, if I made a fuss about it - I have absolutely ZERO interest in breaking this controller down AGAIN, ands then putting it all back together AGAIN!! So, it's staying like it is, and it looks pretty great, and feels solid enough, so I am over all, very pleased with the end result. If you are considering purchasing this kit, and one of your thoughts in consideration, is trying to avoid shelling out an arm and a leg, just to be able to continue gaming with your existing Elite Series II controller, I would say this is a "no-brainer"... Stop looking around for better options, because there is not one, and just place your order for which ever one of these colors you prefer, and get your controller fixed up, so you can get back to gaming again. And if you are thinking about just purchasing a new controller all together, then look me up so we can connect, and I'll take the one you are planning on trashing! No seriously though... Don't let the idea of taking apart your controller freak you out and cause you to spend unnecessary money. This is not any crazy difficult task, and if I can do it with my raging ADHD symptoms constantly nagging at me, then you definitely can get it done, no problem. It really just takes a little commitment, $24.99 plus tax of course, and a willingness to subject yourself to a few minor irritations along the way, and before you know it, you will be all finished, and if you happen to be like me, and replacing the shell of an Elite Series II Core controller, then you will absolutely be stoked when its all finished up, because you won't have to look at that lame white controller anymore, because it will be "customized", and much much sweeter looking once you've gotten through the process!
G**.
Highly recommend
Excellent instructional video to go along with the tools and extra small parts. Will be recommending to friends and family. Shipping was really quick as well. Controller looks and feels great. Reminds me of the 64 clear console and controllers.
A**R
No complaints, easy recommend
The rubber pieces on my Elite controllers always get gross and start to peel after a year or two. This shell saved the day. Looks and feels like a new controller. Pay very close attention to orientation of the small pieces, order of operation etc. and take your time. Instruction video is pretty easy to follow but they don't always highlight some of the steps that can be tricky. Comes with all the tools and extra screws. Controller works and feels great now.
C**R
No grease just insert for a tight fit
I think this case is fantastic. Looks great and feels great. Awesome video to help you through the steps too.
J**Y
Bought this shell as the Rubber Grips on my Xbox Elite Controller Series 2 had came off and I was having issues with the Bumpers. (While you have the shell off, spray the bumper buttons with some WD40 or Isopropyl Alcohol) Has issues with the installation of the Hair Trigger switch, as the video didn't clearly show that the piece needed to slide under another piece of plastic, however the rest of the instructions were clear and easy to follow. I never used the provided purple XYAB buttons, triggers or bumpers due to aesthetic reasons, but the new shell looks great and feels comfortable in my hands. You may want to look into purchasing a replacement battery as many controllers have had issues with bulging batteries, and you could easily replace this too while replacing the shell.
B**H
Top 👌🏼
M**E
Die Hülle ist gute Qualität nur der Umbau ist ein bisschen fummelarbeit
M**A
Bien el estado era bueno pero no puedo decir mucho ya que la devolvi me equivoque de modelo
A**L
It's very easy to be replaced.
Trustpilot
Hace 2 meses
Hace 2 semanas