Some deliveries may take a little longer than usual due to regional shipping conditions.

Descargar la aplicación


Servicios al cliente
Sobre nosotros
Copyright © 2025 Desertcart Holdings Limited
Descargar la aplicación
Full description not available
E**L
Really easy -- don't worry
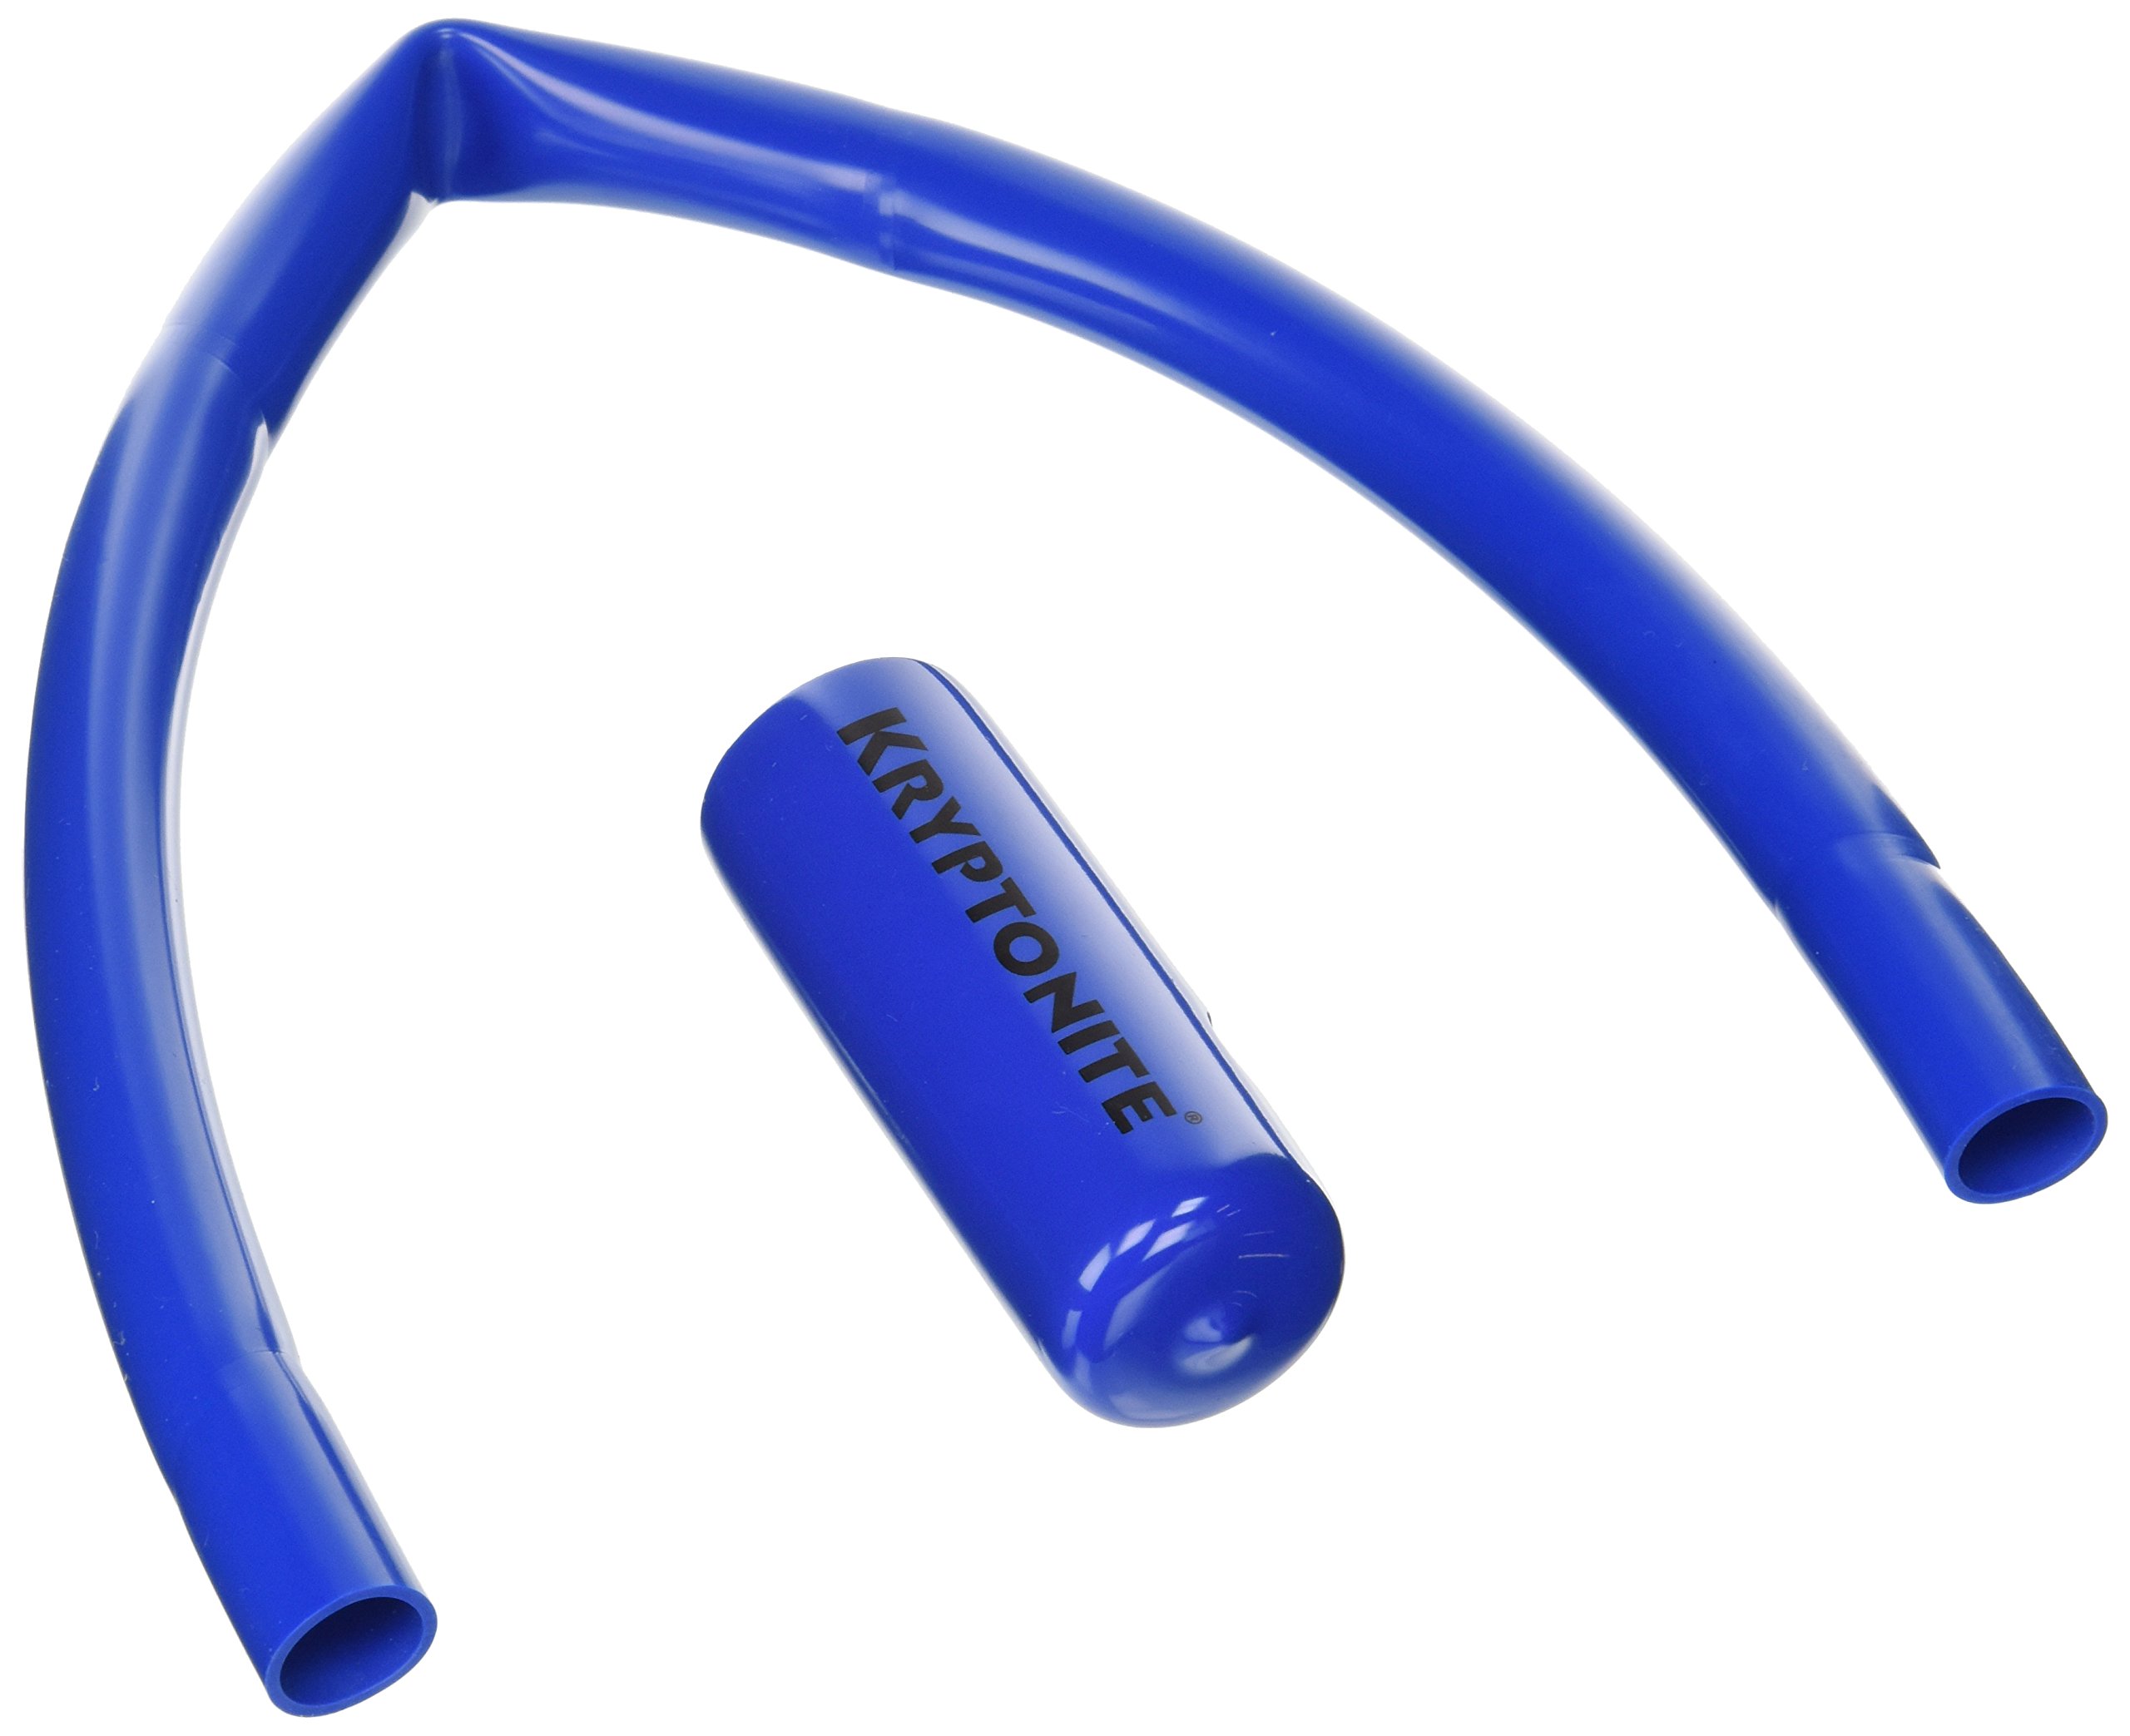
I got this for my new mini-u lock, to help it match my bike, and to distinguish it from my sweetie's when we grab them from the bike shed. One of the reviews here made me a bit nervous that it would be a pain to install, so I wanted to come back and report. I think the manufacturer's instructions might make it seems a little more complicated than it really is, as they cover a lot of contingencies and have hints you might not need. Basically:1. Easily wiggle off the pieces on the crossbar and replace with those provided. There is no real resistance or difficulty with this part.2. Remove the two rubber gaskets and the hanging mount if you have one from the u-shaped part of the lock.3. Cut off the vinyl cover on the u-shaped part of the lock. They suggest heating the metal and existing vinyl cover in hot water first, to make it pliable enough to fit scissors under the edge, but it was easier to just carefully use a box cutter.4. Adjust the size of the replacement vinyl cover per the directions to roughly match your lock size (you will do final trimming later)5. Heat the metal and the new vinyl in hot water for 2-3 minutes to make things easier (this time it is necessary); put a spoonful of dish detergent in your hand and coat the u-shape; dry your hands for traction.6. Quickly slip the new vinyl over the metal, scooting it along until it is in place. Using a cloth for traction helped. There will be some extra on both ends. This is the step others seem to have had trouble with. It took me about 90 seconds. I think it would have been much messier if I had used actual bike lube. The directions include a bunch of hints, and how to get it started again if the vinyl loses pliability before you get it all the way on, like re-warming and re-lubing, or using an air gun. They also mention a YouTube video, but I did not need to refer to it.7. Trim the ends of the vinyl to the right length specified in the directions, and replace the rubber gaskets and hanging mount.The whole thing took about 15 or 20 minutes, including reading directions and all set up and clean up. I really like the new look. Good luck!
T**T
Great product, VERY EASY to install!
At first I was hesitant to buy this as a lot of the reviews focused on how difficult the skin was to apply. However, I had absolutely no difficulty. What might have helped is that I used very hot water, let it soak for a full three minutes, and I put a lid on the bowl I used to keep more of the heat in.The skin slid on very easily. What I wish I did differently was to cut the skin to the correct length before putting it on. I was able to cut the excess skin off, but I feel it would have been a little easier to cut it while off of the shackle.I bought this for two reasons. I love the color white and this skin certainly expresses that. The lock now is very striking and goes better with my white bike. (Now to find a better-looking cable to match!) Also, the rubber cap on my lock was broken and exposed the end of the lock, allowing it to rust and sometimes freeze when water got in.This was so easy I wish I had installed it months ago when I first purchased it. Do not let those other reviews put you off!
S**H
Installation was a bit of work but worth it
Installation was a bit of work but worth it. This is after all a vanity item. The difficult part is the U part of the lock. The top bar is easy to replace.1. You have to cut off the previous skin. So there is no going back.2. Measure up the skin to the lock and cut to the correct length. I messed up on this part and mine was a tad short, so had to cut a tiny bit extra bit so there would not be more bare lock exposed.3. You need to heat of the lock and the skin in some hot water.4. Once heated up, lube up the lock with some soap.5. Slide on the skin, the lock will be hot and slippery so a towel or something else to help with the heat and soap is helpful.
M**E
Great for customization. A little tough to get on, but not impossible. No air gun or special lube required.
Product looks great once it's on there. I generally followed the instructions and would mention these three things.1) I had a really hard time removing the old vinyl (orange) cover from the crossbar. Some reviewers mentioned this was easy to wiggle off, but not for me on my mini-Evolution. A stronger (male) friend was finally able to pull it off for me after we soaked that end of the crossbar in hot water for a few minutes. I suppose I could have cut it, but I was trying to keep it in one piece in case I had to put it back on.2) After letting both the new vinyl tube and bare shackle pieces soak in hot water for 5-10 minutes (instead of their recommended 2-3 minutes), I used regular Dial hand soap to coat the shackle part. The important part in putting the new vinyl tube on was keeping my hands and the vinyl dry so that I could get a good grip on it. As long as I had a grip, it would slide pretty easy. I DID NOT use an air gun or any special lube and once everything was soaked in hot water, putting on the new vinyl tube took less than 5 minutes.My advice on this step since it seemed to get the most comments from other reviewers: -Have a towel handy -Let both the new vinyl tube and bare shackle pieces soak in hot water for 5-10 minutes -Coat about 2/3 of the shackle generously with soap - starting with the straight leg and continuing up around the top of the "n" (I used regular Dial hand soap and starting with the straight leg means there's one less curve for the new vinyl tube to have to slide over) -Dry your hands -Dry the outside of the warm vinyl tube (you won't get anywhere if you can't get a good grip on it) -Hold the non-soapy leg of shackle with ONE hand -Grab vinyl tube with other hand and start sliding it over the soapy leg of shackle -About 2/3 of the way through when the new vinyl tube has covered most of the soapy part, stop -Now put soap on the remaining exposed part of the shackle and set shackle down -Dry both hands again -With one hand, grab hold of the shackle in a spot where it is covered with the new tube and continue sliding the tube, only this time rest the bottoms of the shackle against the counter or something so that you only have to use one hand to do the sliding and not interfere with the soap3) I ordered the white skin. It was hard to tell from the picture, but the dust cover that comes with the white skin is clear colored. This means that when it's on the crossbar, it appears black. I wish it was white or silver colored.
P**N
Kryptonite skins
Great product. Their locks are popular, we have four in the family so to be able to customise in this way is great. However why do they not do a green colour as well, would buy that. Order arrived promptly. Not too difficult to fit, took about 10 minutes in total, worth the money.
M**T
Five Stars
This makes your bike un-nickable!
L**.
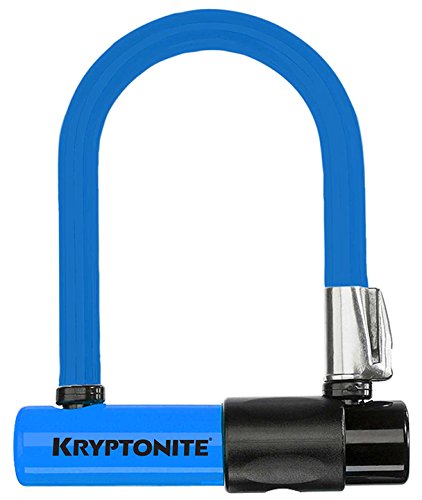
Compatible avec u lock OnGuarD😎
Mini u lock OnGuard
J**E
Echt cooles Schloss!
Tolles Messenger Schloss! Klein Handlich leicht und trotzdem fast unzerstörbar!Haben vor kurzem drei Stahlis ( Räder mit Stahlrahmen--> kleinerer Oberrohrdurchmesser) zusammengeschlossen weil kein Laternenschild da war!.Absolute Kaufempfehlung
J**E
Great Product!
This is a great idea for a lock which previously was a disgusting orange!I was guided by the instructions written in a recent review of this product on amazon.com. In other words, just follow the basic manufacturers instructions, without the bits which are added in case the skin doesn't go on correctly. It all went on like a dream (and like a previous reviewer, I am a woman, and not a whiz at DIY or anything), and I thought it was going to be so difficult. As long as you use washing up liquid it's all very straightforward.And it looks really great on my bike!
Trustpilot
Hace 1 mes
Hace 5 días